





How to Clean Your Vape Tank: The Complete Guide
Knowing how to clean your vape tank, coil, and mouthpiece can keep your device working and avoid early replacements. When you notice that your vape's flavour isn't very strong or that it's making gurgling noises, the first step is to give it a thorough clean.
In this guide, we'll reveal why you should clean your vape tank and the step-by-step process.
Why Should You Clean Your Vape?
When it comes to vape kits, the tank is often overlooked in favour of other components like the battery. But it's one of the most important parts because the tank holds your vape juice, the coil, and the mouthpiece.
If you don't clean your vape tank regularly, you might notice the following problems:
-
Poor flavour quality due to old e-liquid residue
-
Stale, burnt, or other weird tastes
-
Gurgling and leaking
Cleaning the tank lets you enjoy your favourite vape flavours, avoid those dreaded burnt tastes, and ensure your tank lasts longer.
The Things You'll Need to Keep Your Vape Tank Clean
You don't need expensive cleaning supplies or chemical solutions to clean your vape device. In fact, you'll probably have most of the items to hand:
-
Warm water in a bowl
-
Cotton swabs
-
Kitchen towel or a lint-free cloth
-
Mild washing liquid for deep cleaning
-
Isopropyl alcohol, if there's residue on metal components
How to Clean a Vape Tank
Cleaning your vape tank is a simple process that doesn't take long. Plus, when it's done, you can enjoy a smoother vape and maximum flavours.
Step 1: Empty the Tank
Empty your vape tank. If the e-liquid is old, you should pour it out, but you can transfer newer vape juice into a clean bottle.
Step 2: Take Apart the Tank
Vape tanks have a glass section, a mouthpiece, o-rings/seals, a base, and a coil. Separate the tank from the base of your device, as this contains the battery pack. Then take apart individual components, removing the coil from your tank.
Step 3: Rinse the Components
You can rinse the mouthpiece, tank, and metal components under warm (not hot) water. However, if there's a buildup of residue, you should let them soak in a bowl of warm water for up to 15 minutes.
For really stubborn residue, it's best to add a small amount of washing-up liquid.
Once the components have soaked, rinse them thoroughly to remove any washing-up liquid.
Step 4: Dry the Tank
Use paper towels to dry the tank and mouthpiece, then let them air dry for 30 minutes. Check that the tank is fully dry before reassembling it.
How to Clean a Vape Coil
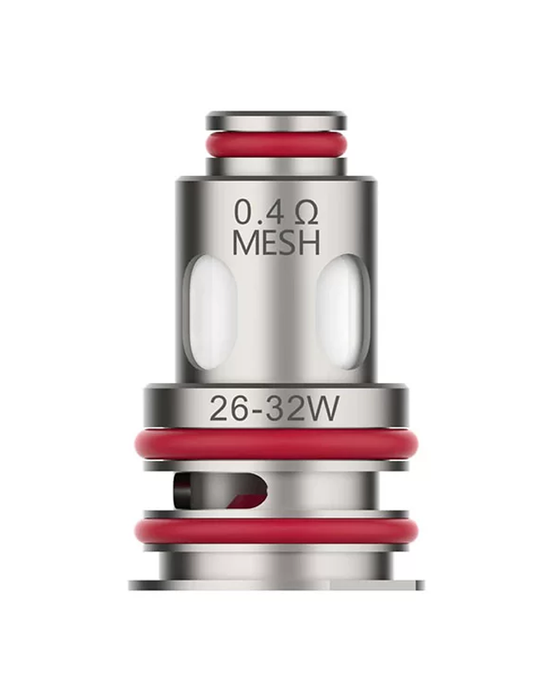
In most cases, you won't need to worry about the vape coil as it's meant to last for 1-2 weeks (or longer for light vapers). But if you're using a new coil and notice issues, you may want to clean it rather than throw it away.
The process is simple:
Remove the coil from your tank and rinse it under warm water
Shake it to remove excess moisture
Leave the coil to dry for at least 24 hours
While this is beneficial if you're changing flavours, washing a coil won't fix the burnt taste. If you notice any dark tones in the cotton, reduced vapour production, gurgling, or leaking, it's time to replace your coil.
How to Clean the Mouthpiece
The mouthpiece often gets ignored, but you use it every time you vape. This means the mouthpiece is prone to dust, condensation, and bacteria. It's one of the simplest components to clean:
-
Remove the mouthpiece from your tank
-
Rinse it under warm water
-
Use a cotton bud to gently wipe the inside
-
Dry the mouthpiece before replacing it
Remember the Battery Connection
So, you've cleaned your vape tank, mouthpiece, and coil...but what about the battery connection? It's a common place for leaked e-liquid to accumulate, which might mean the device doesn't fire properly.
It goes without saying that you should never expose the base or battery pack to water. When cleaning your battery connection, please follow these steps:
-
Switch the device off and remove the tank.
-
Use a cotton bud or a kitchen towel to wipe the battery connection.
-
Make sure you remove any e-liquid.
How Often Should You Clean Your Vape?
It depends on your vaping habits. If you're a light vaper, you can probably go for longer between cleans, but regular vapers should follow these guidelines:
|
Vape Component |
Recommended Cleaning Frequency |
|---|---|
|
Tank |
Every 1-2 weeks |
|
Mouthpiece |
Every few days |
|
Coil |
Rinse when you're changing flavours (replace every 1-3 weeks) |
|
Battery connection |
Weekly |
Mistakes You Should Avoid When Cleaning Your Vape Tank
Most people have no problems cleaning their vape tank, mouthpiece, and coils (if necessary), but there are some mistakes to avoid. These include:
Ignoring A Burnt Taste
Cleaning your vape coil won't solve a burnt taste, because the cotton is either worn or damaged. The only way to get rid of the taste is to replace the coil.
Reassembling the Device When It's Wet
If you reassemble your device when the tank has moisture, it can cause a gurgling or popping sound. Let the components dry completely before reassembling them.
Using Strong Chemicals
Never use disinfectants, bleach, or household cleaners. All you need is some warm water and a drop of washing-up liquid if necessary.
Forgetting the O-Rings
The O-rings are easy to ignore, but they actually play a vital role in your vaping experience. These small seals prevent leaks, and you should always check them for damage, including cracks or stretches, when cleaning the tank.
How to Keep Your Tank Components Cleaner for Longer
Regular cleaning is vital for your vape tank, but small steps can help it last longer. This includes:
-
Storing your vape device upright if possible.
-
Never overfill the tank.
-
Check that your mouthpiece is free from dust.
-
Clean the tank when you change flavours.
-
Wipe away any excess vape juice.
Alternatively, if you want a stress-free solution that lets you avoid cleaning the vape tank and its components, choose a convenient pod device.
Instead of cleaning your vape tank, you remove the pod and replace it as and when needed.
The Bottom Line
Cleaning your tank and mouthpiece enhances flavour delivery, which provides a better vape experience. Remember, while you can clean new coils, it's often best to replace them. Simple maintenance keeps your vape lasting longer and lets you enjoy mixing it with e-liquids.
If you have any questions about which device to choose or how to clean the tank, our experts are always here to help. Please get in touch with us today.